
Date: 08/29/2020
New Update – Kitchen Visualizer
New Update – Kitchen Visualizer
Here at SlabWare we’ve updated our kitchen visualizer to 3D! And you can now add your favorite slabs to use in this feature! Edit your layout, choose the materials, and walk your client through the scene!
Let’s see how it works.
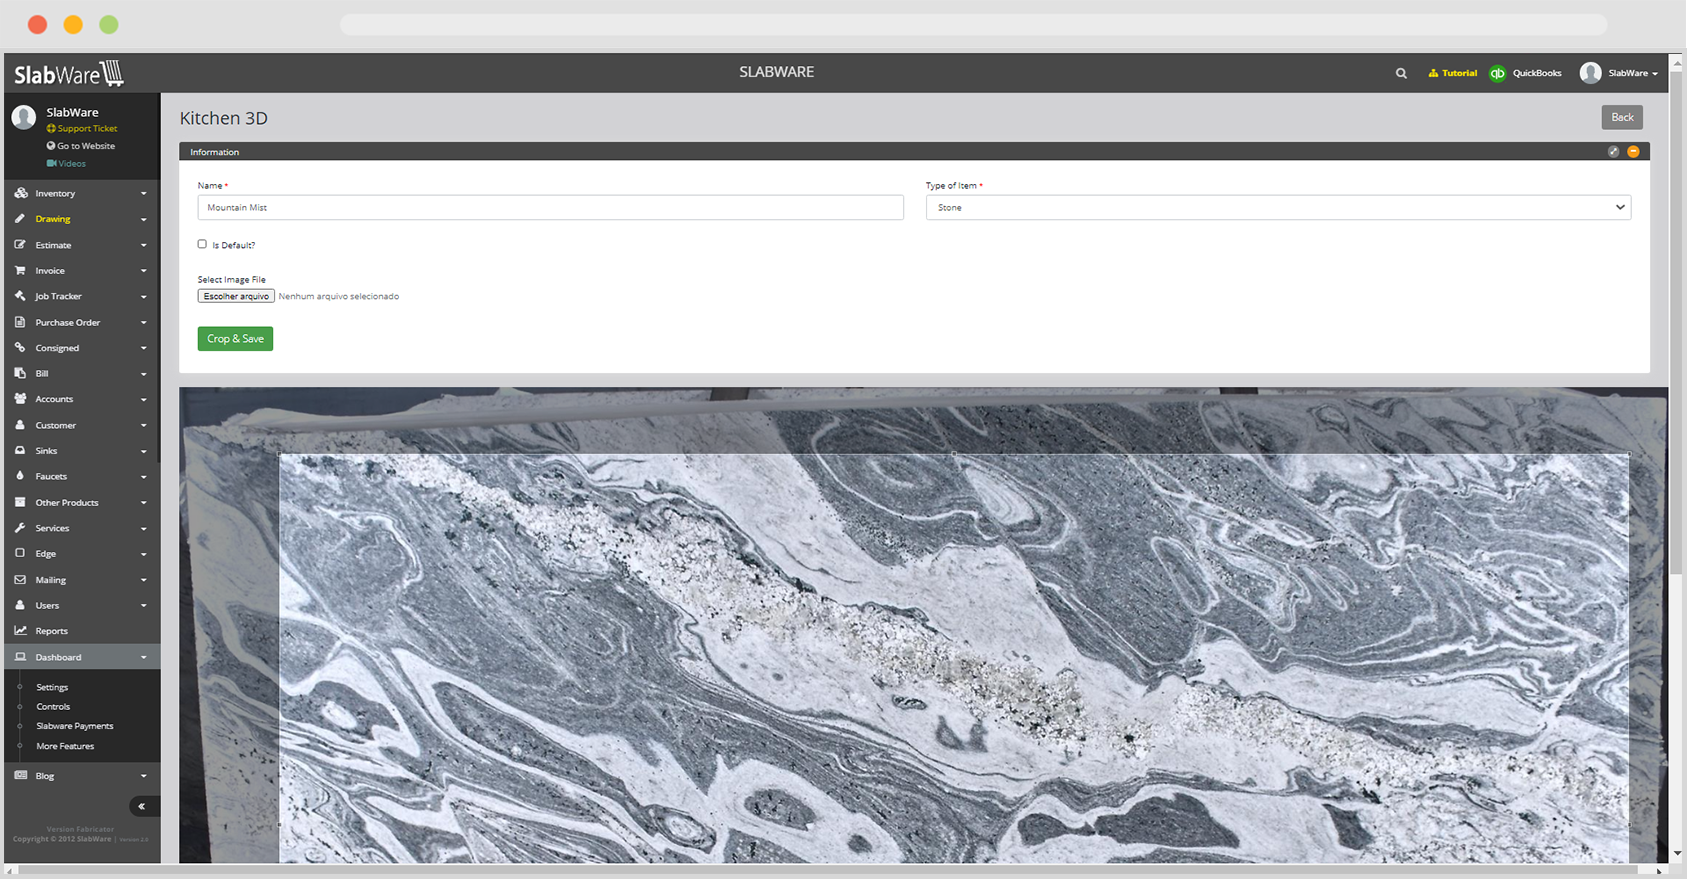
Step 1

From the backend system go to Dashboards – Settings – Kitchen Visualizer 3D
You have to Enable Kitchen Visualizer 3D to display on the front end.
Please go to DashBoard -> Settings -> Configuring Pages -> Tab Menu and Footer -> UnCheck Kitchen Visualizer 3D
Step 2
Here you can add your materials. That will appear on your Kitchen visualizer.

You’ll find materials are divided into 4 categories: stone, wall, floor, and cabinet. This is important as you’ll have to select which surface type you’re uploading the image for.
To actually add the image, click on “New” from the top-right of the page.
Then, click “Choose File” and the upload will begin. Next, you’ll need to choose a name for this material. This is how the material will appear on your front end. The final step is to add the material to one of the categories above.
If everything looks okay, click save.
Step 3

Next, you’ll need to open the Kitchen Visualizer.
To view your newly added materials you’ll need to click the yellow brush on the surface you wish to change. Remember, things added to the stone category will only appear as an option for stone surfaces in the kitchen.
You can navigate the scenario using the W, A, S, and D keys. To change your point of view within the scenario left-click anywhere or use the left/right arrow buttons of your keyboard.